如何在Windows上搭建并运行DolphinScheduler前后端开发环境
作者:海豚调度研究随笔
编辑整理:曾辉
前言
Apache DolphinScheduler 是一个优秀的分布式调度系统,广泛应用于大数据处理和自动化任务管理中。本文详细介绍了如何在Windows环境下搭建Apache DolphinScheduler的前后端开发环境。
包括从源码的下载、环境配置、数据库初始化、依赖安装等具体步骤,帮助开发者在本地快速搭建并运行DolphinScheduler,适用于新手开发者和有一定经验的技术人员。
相关链接
- Apache DolphinScheduler官网:https://dolphinscheduler.apache.org/zh-cn
- Apache DolphinScheduler源码仓库:https://github.com/apache/dolphinscheduler/
一、环境准备
1. 下载源码
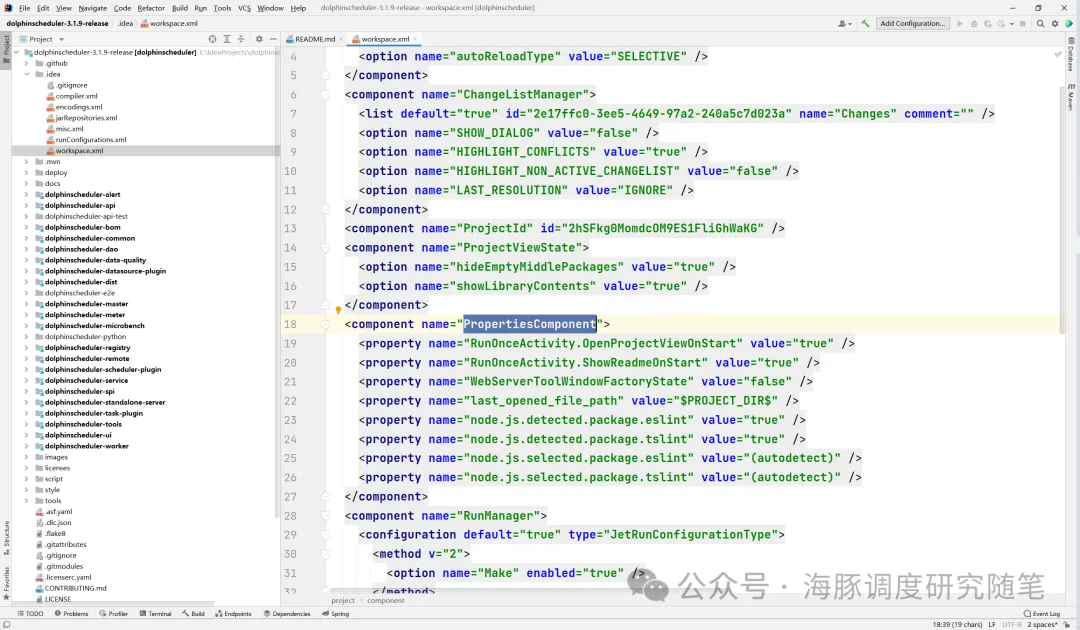
首先,前往 DolphinScheduler官网 下载 dolphinscheduler-3.1.9-release.zip 源码压缩包,并将其移动到你的IDEA工作目录中。接着,使用IDEA工具解压并打开该项目。你将看到如下界面:

2. 修改IDEA项目配置
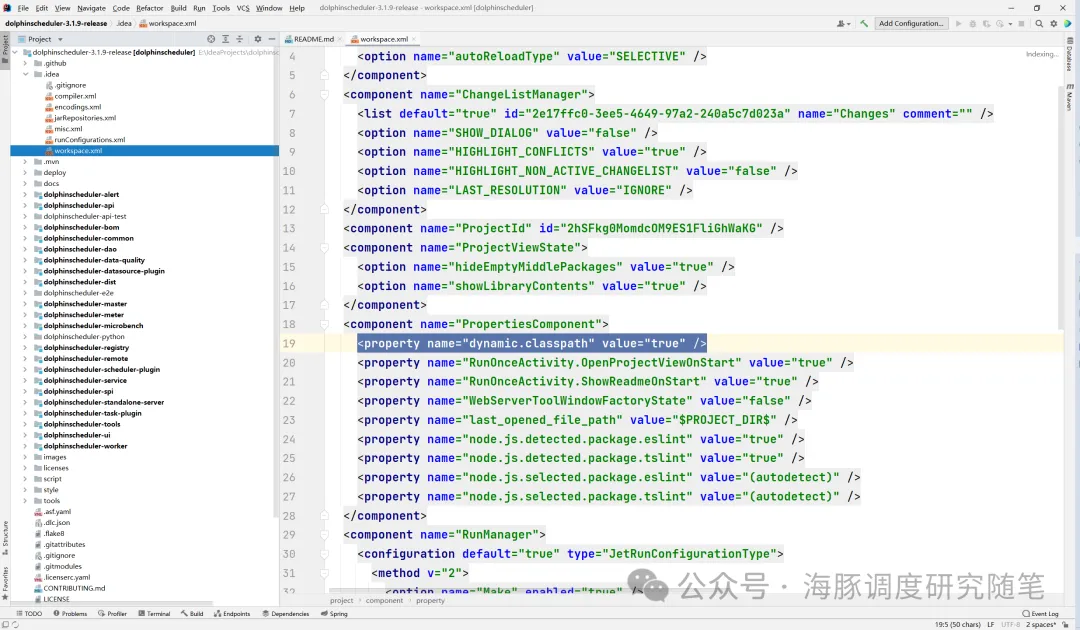
找到 .idea 文件夹下的 workspace.xml 文件,打开并进行如下修改:
在 <component name="PropertiesComponent"> 下增加一行<property name="dynamic.classpath" value="true"
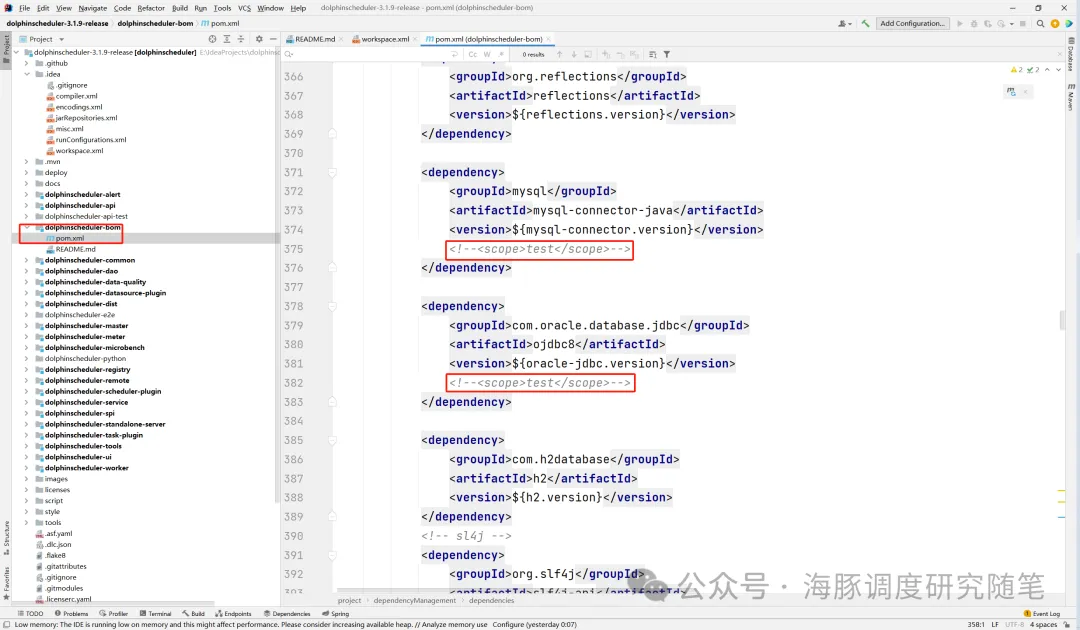
打开dolphinscheduler-bom模块的pom文件,将MySQL和Oracle的依赖中的<scope>test</scope>注释掉,右上角的Maven要记得点击进行更新。
这将动态调整项目的类路径配置,确保IDEA能够正常加载所需的依赖包。
二、数据库配置
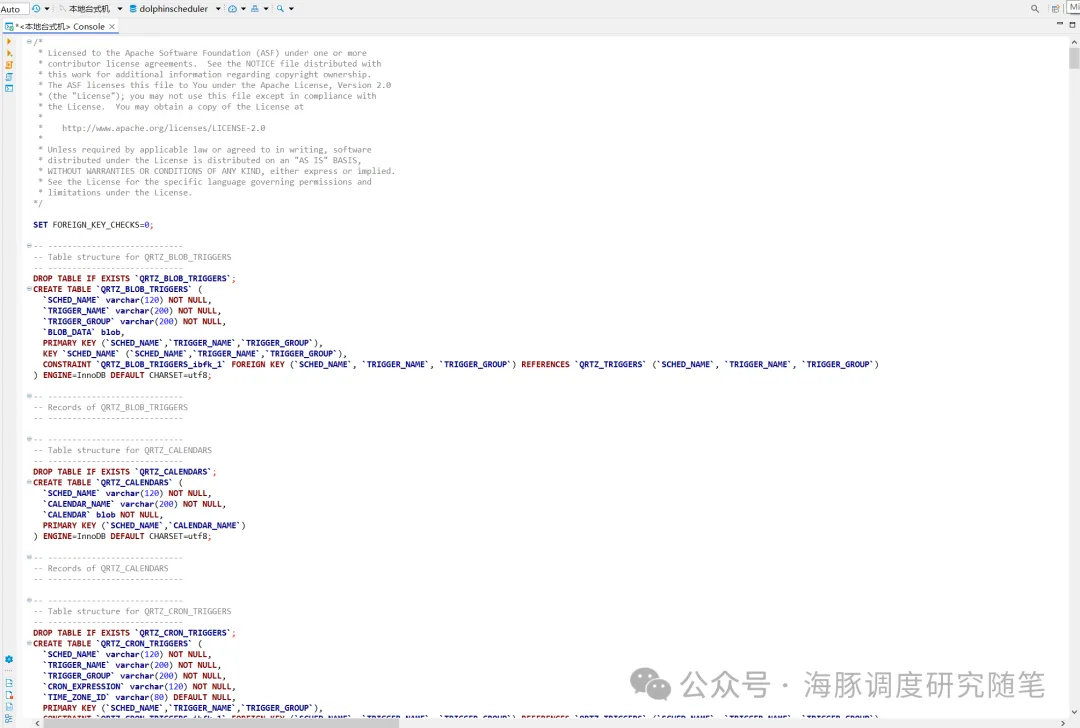
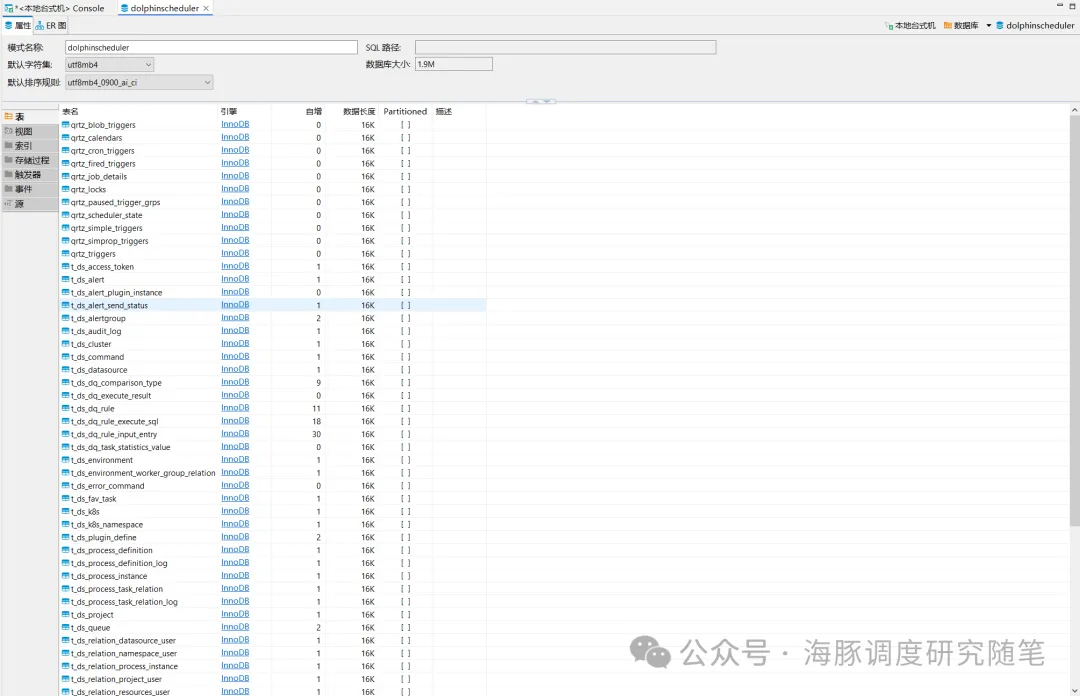
创建DolphinScheduler数据库
在MySQL中创建 dolphinscheduler 数据库,并执行提供的SQL脚本进行数据库初始化。


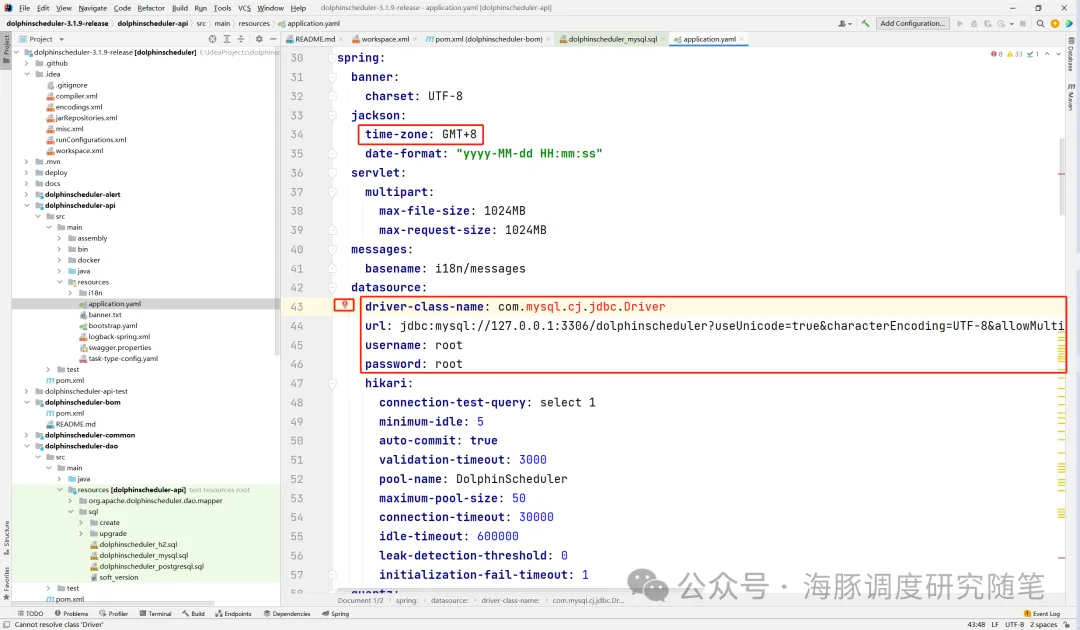
配置 application.yaml
打开 dolphinscheduler-api 模块的 application.yaml 文件,修改以下配置:
- 时区(time-zone):根据需要调整。
- MySQL 连接信息:填写数据库连接的URL、用户名和密码。
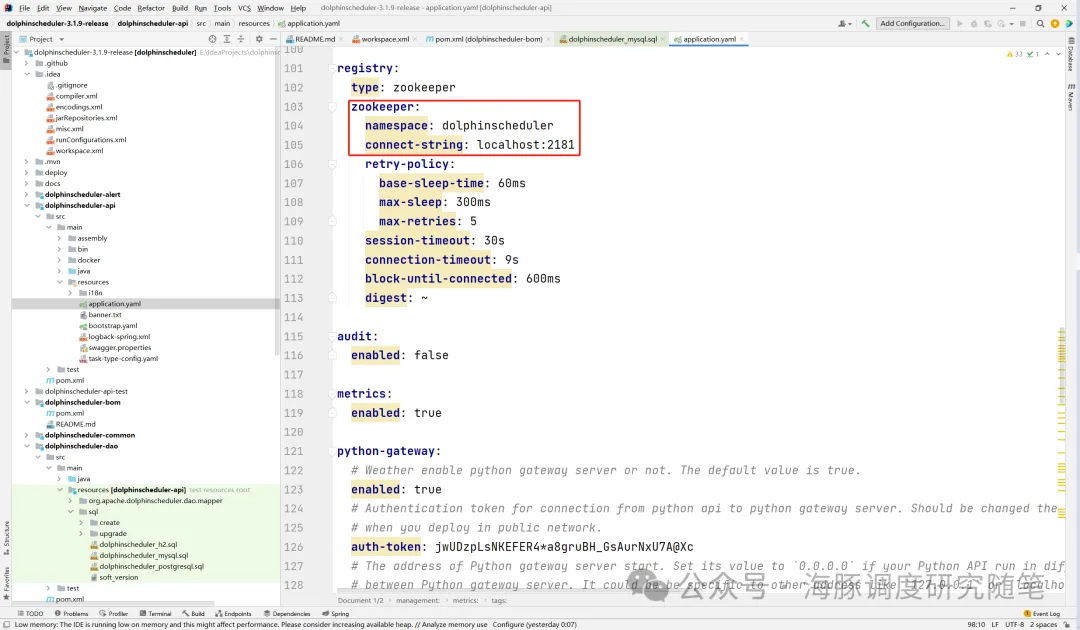
- Zookeeper配置:根据你的Zookeeper集群配置进行调整。
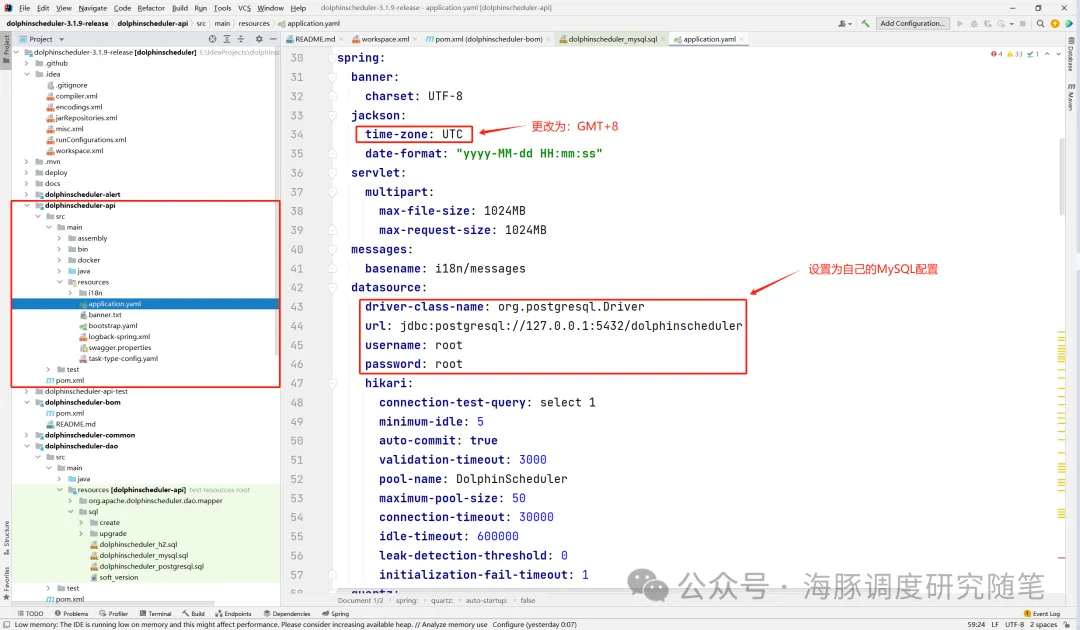
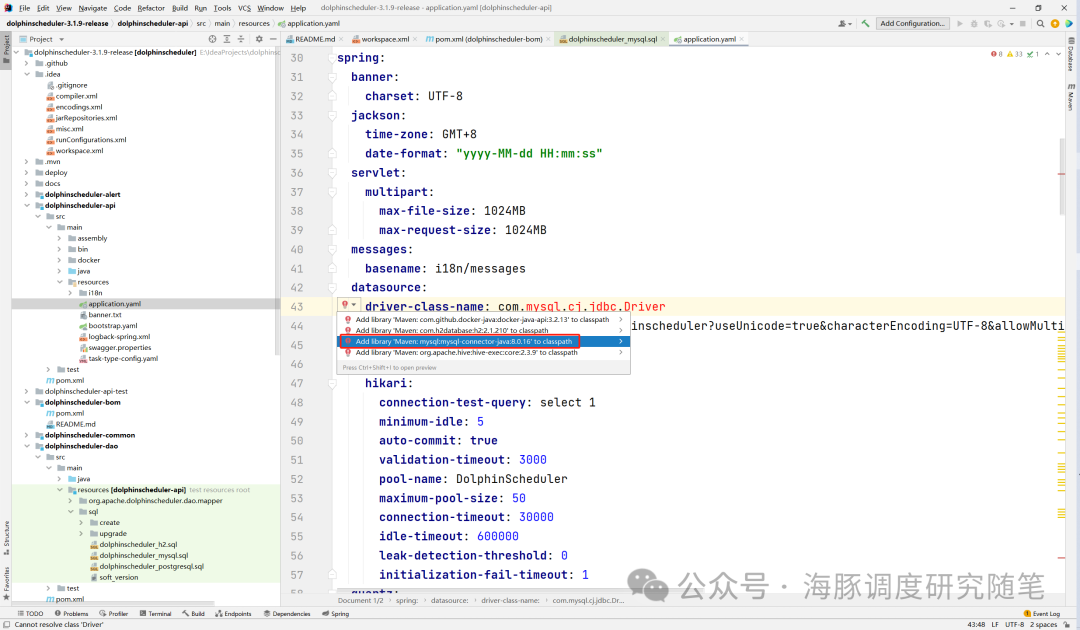
如果IDEA提示缺少MySQL JDBC驱动,可以点击红灯泡提示进行自动加载。
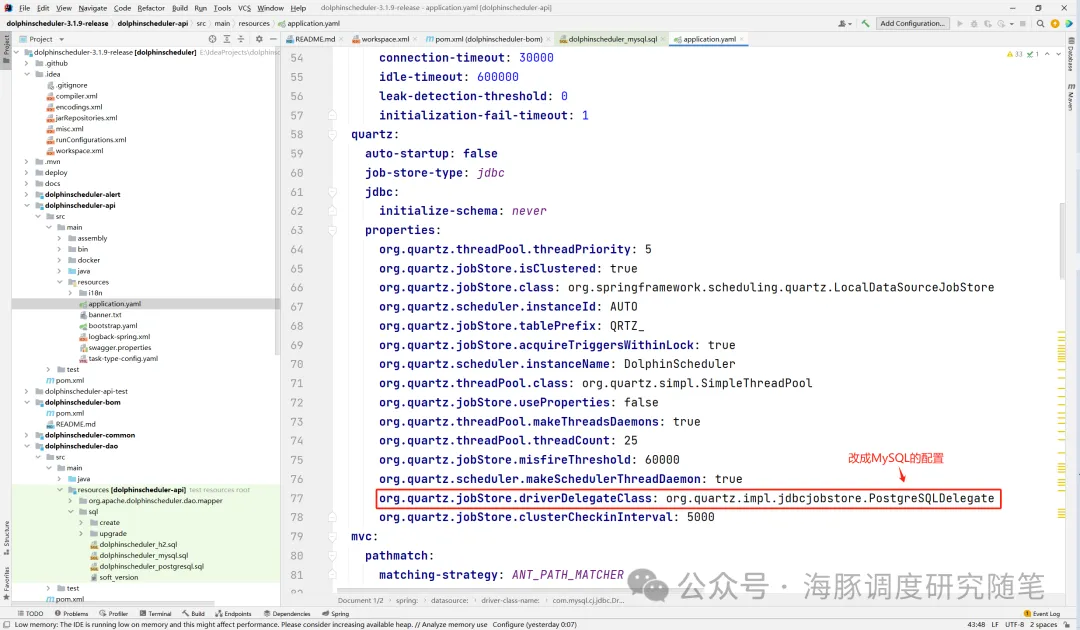
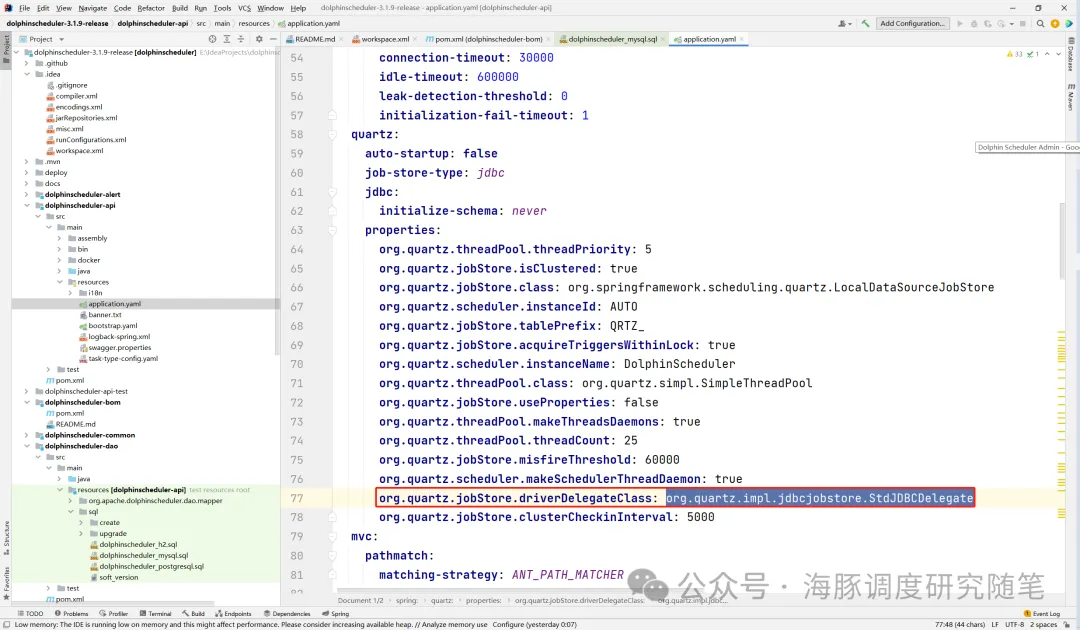
确认Quartz调度的JDBC Delegate类为 org.quartz.impl.jdbcjobstore.StdJDBCDelegate
本地Zookeeper配置
如果Zookeeper在本地运行且已正确安装,则无需修改Zookeeper相关配置。否则,需要根据你的Zookeeper集群环境进行调整。
三、模块配置
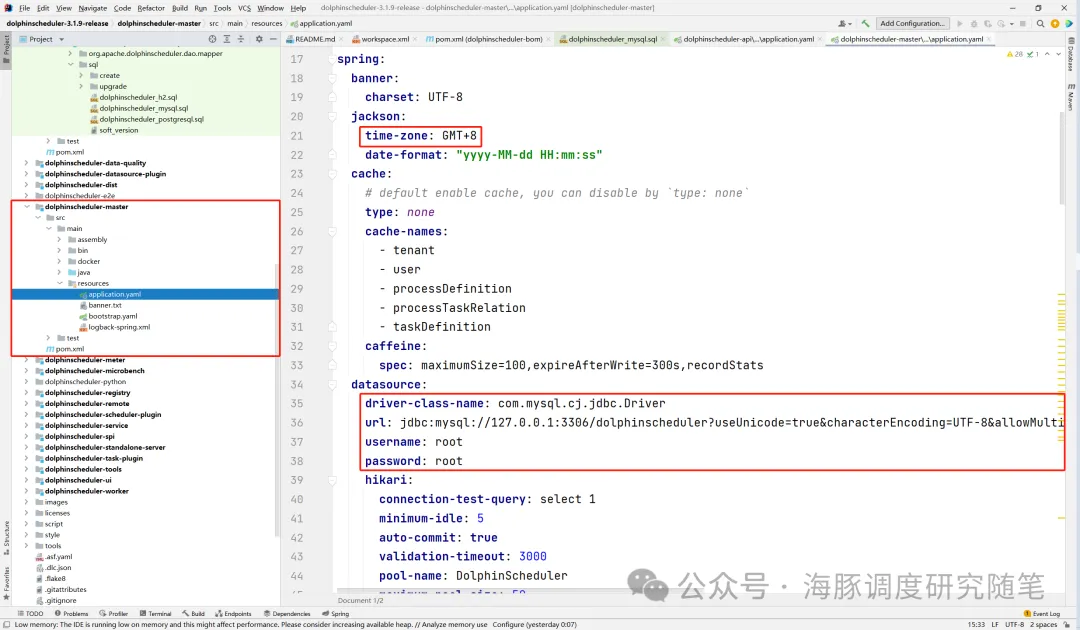
配置 dolphinscheduler-master 模块
在 dolphinscheduler-master 模块中,打开 application.yaml 文件,确保MySQL、Zookeeper的相关参数配置正确,并根据你的需求调整时区配置。

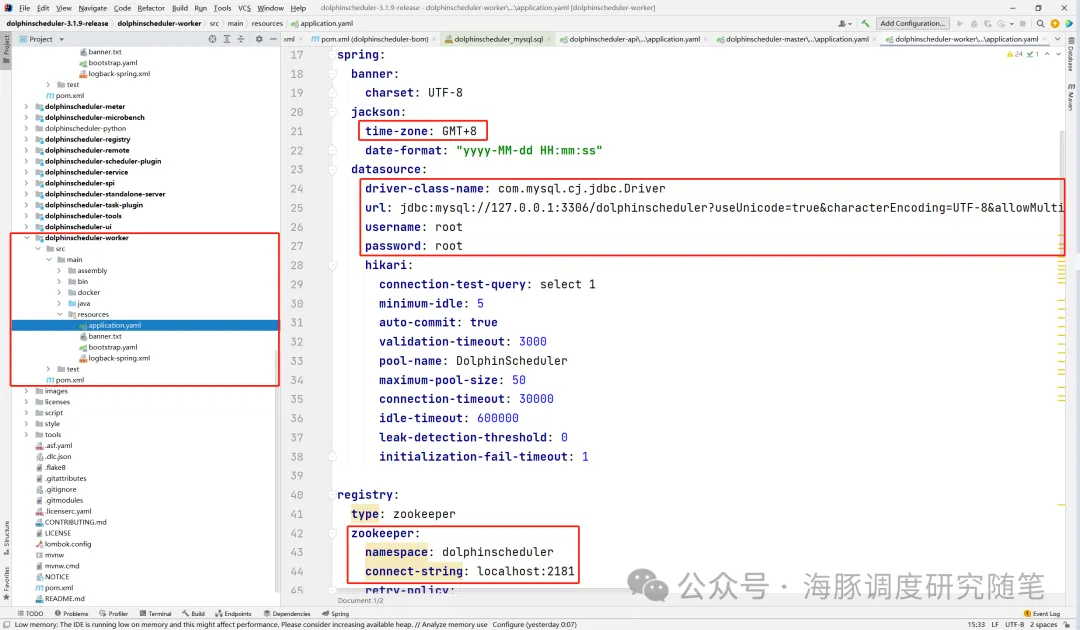
配置 dolphinscheduler-worker 模块
类似于 Master 模块,在 dolphinscheduler-worker 模块的 application.yaml 中,同样需要更新MySQL、Zookeeper和时区等相关配置。
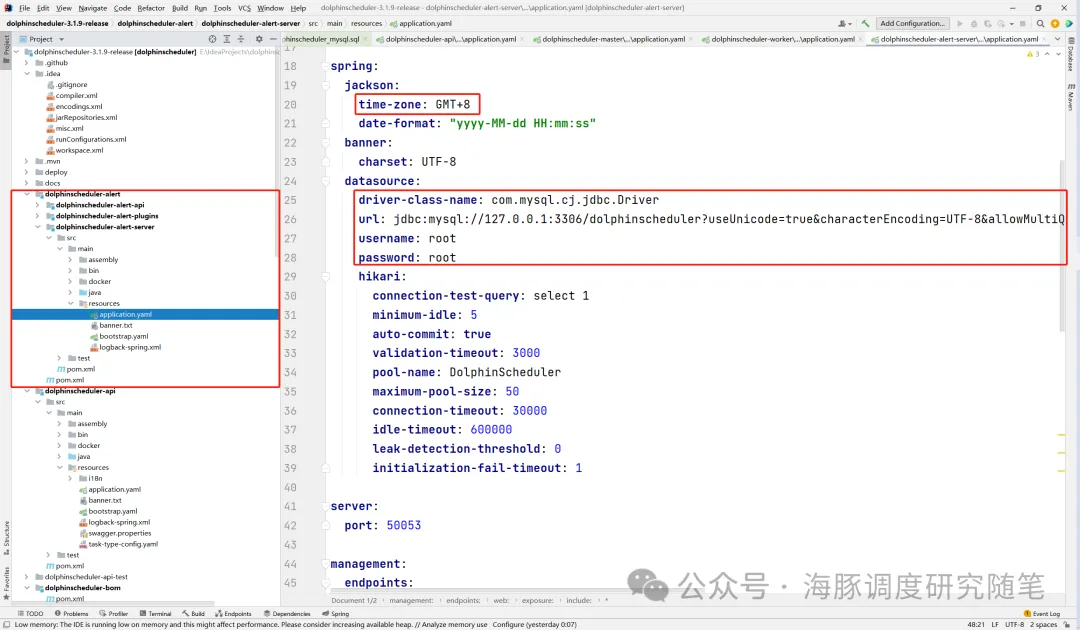
配置 dolphinscheduler-alert 模块
打开 dolphinscheduler-alert 模块的 application.yaml 文件,修改MySQL的连接信息和时区配置,确保警报模块能够正确连接到数据库。
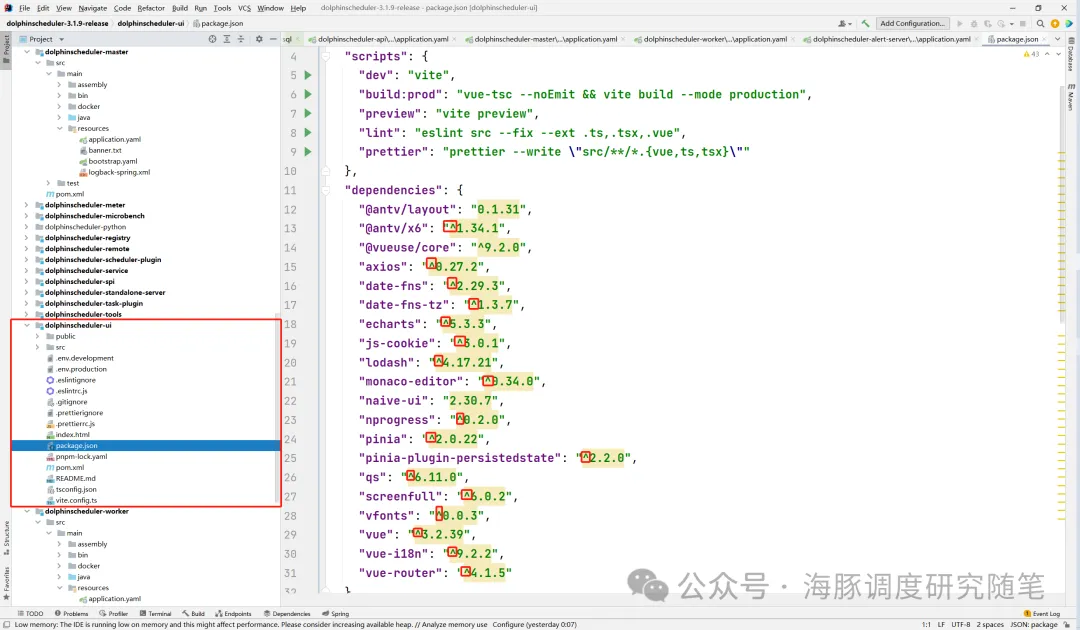
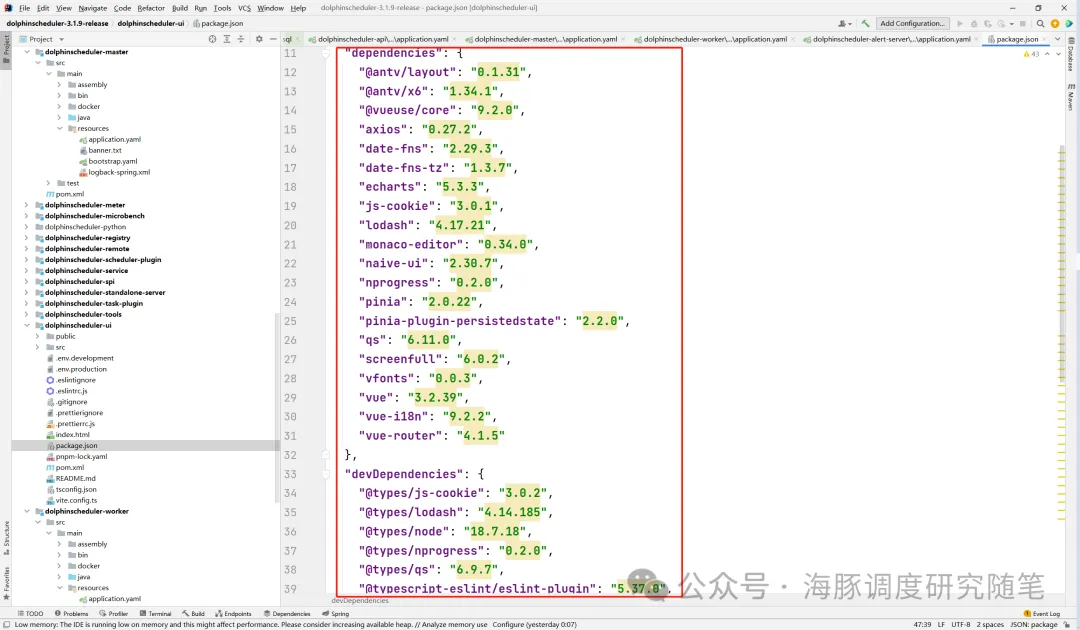
修改 dolphinscheduler-ui 模块的 package.json
为了避免版本冲突,打开 dolphinscheduler-ui 模块的 package.json 文件,去除所有 ^ 符号。
四、启动后端服务
确保你的MySQL数据库和Zookeeper集群已正常启动,依次启动以下后端服务:
- ApiApplicationServer
- MasterServer
- WorkerServer
- AlertServer
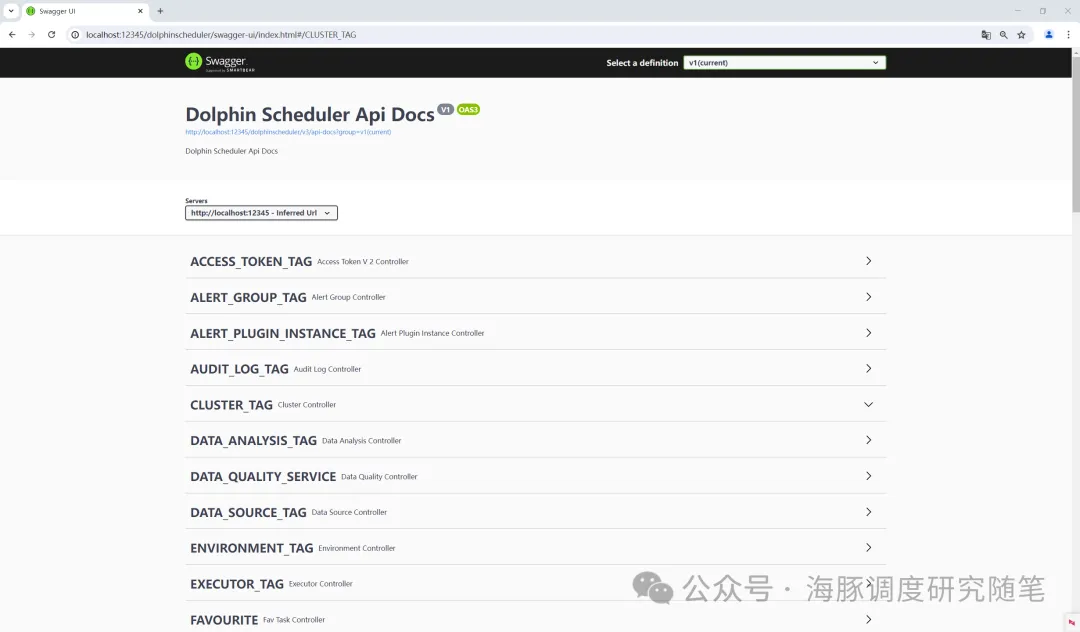
启动成功后,打开浏览器访问API服务的Swagger文档,确认服务是否正常运行:http://localhost:12345/dolphinscheduler/swagger-ui/index.html#/
五、搭建前端开发环境
- 安装Node.js和Pnpm
Apache DolphinScheduler的前端依赖于Node.js和Pnpm。
请根据以下链接下载并安装:
- Node.js (v16.13+):https://nodejs.org/en/download
- Pnpm (v6.x):https://pnpm.io/installation
- 安装前端依赖并启动
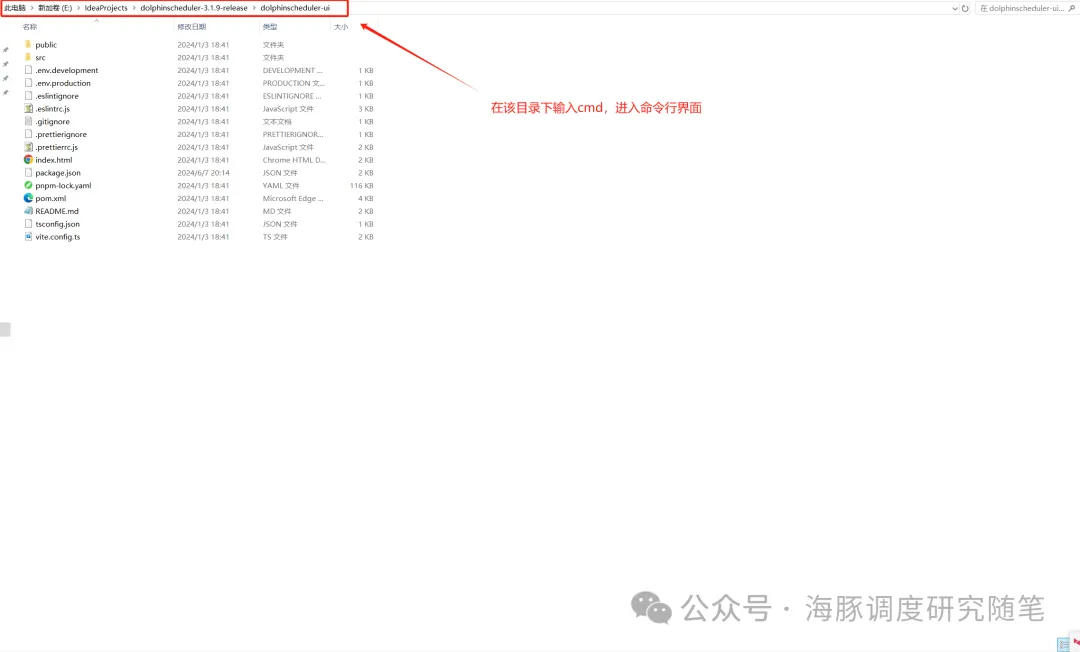
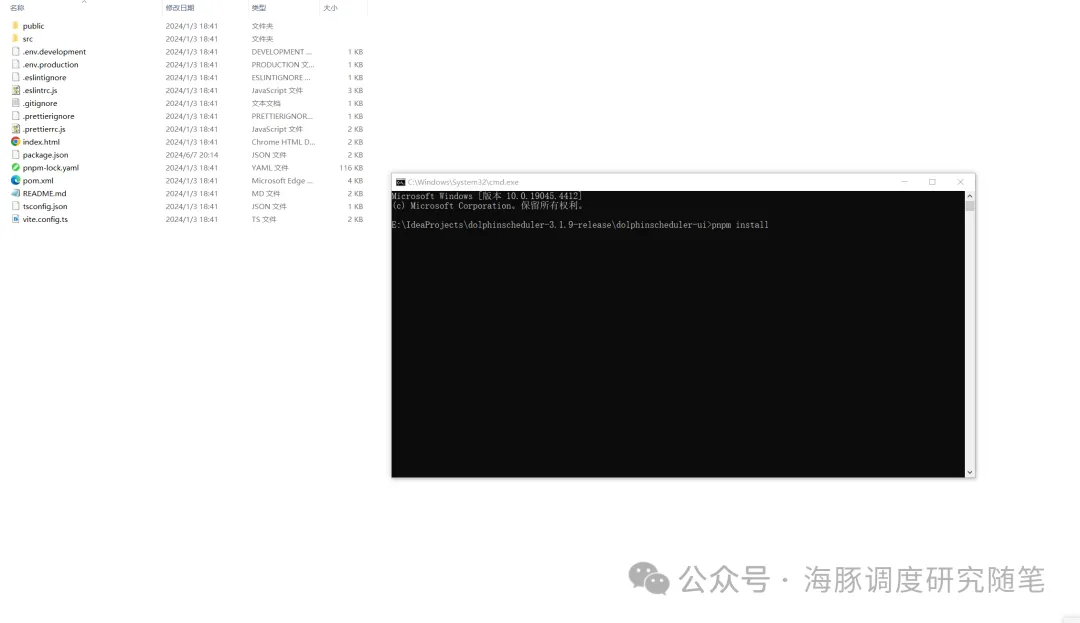
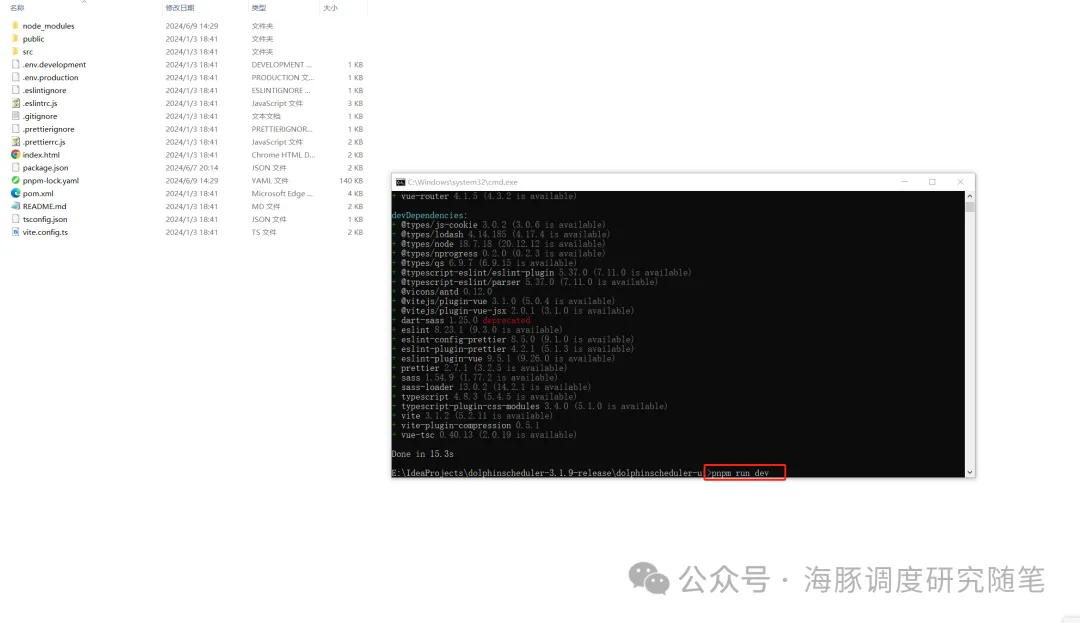
进入dolphinscheduler-ui目录,进入cmd命令行窗口后运行pnpm install,安装后会在目录下生成node_modules目录,然后运行pnpm run dev即可。
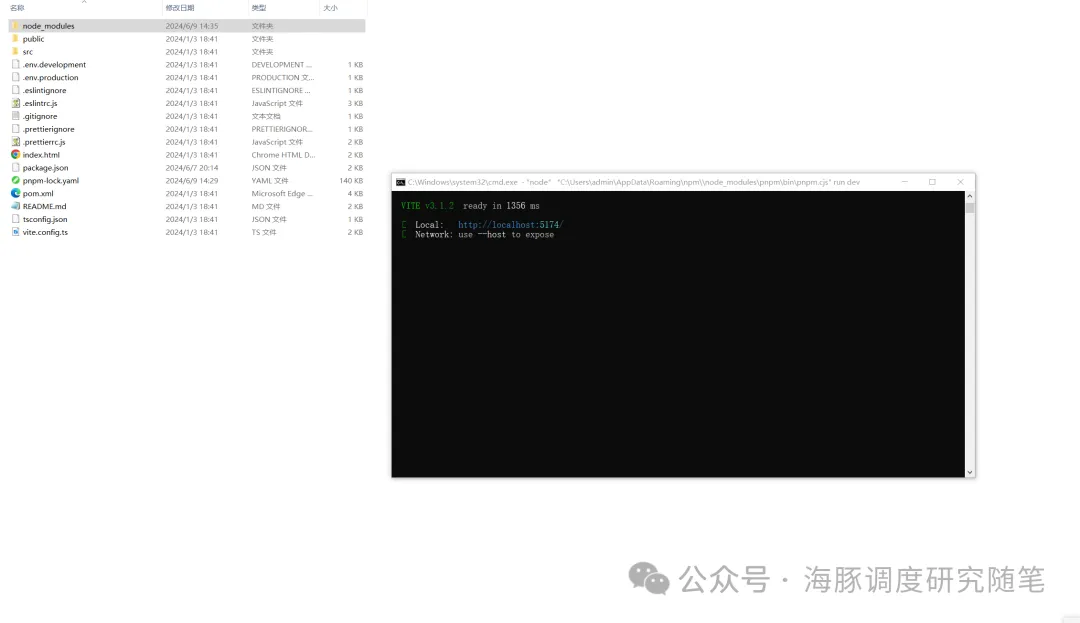
在浏览器中访问http://localhost:5173,使用默认账号密码 admin/dolphinscheduler123 登录系统,开始使用Apache DolphinScheduler。

结语
通过本教程,你已经成功在Windows系统上搭建并运行了DolphinScheduler的前后端开发环境。这为开发者提供了一个完整的本地开发调试环境,使得对DolphinScheduler的进一步开发和测试更加高效。
希望本文能够帮助你顺利搭建环境,并推动你在DolphinScheduler开发上的进展。如果遇到问题,欢迎参考官方文档或社区支持。
本文由 白鲸开源 提供发布支持!